9 Tips
for a Good Distance Learning Lesson
Using Zoom
Switching to an online delivery format can seem overwhelming but we are going to focus on some basics that should have you up and running in no time and recording your lessons or holding virtual office hours with as little hassle as possible.
Tip #1: Utilize a Planning Template
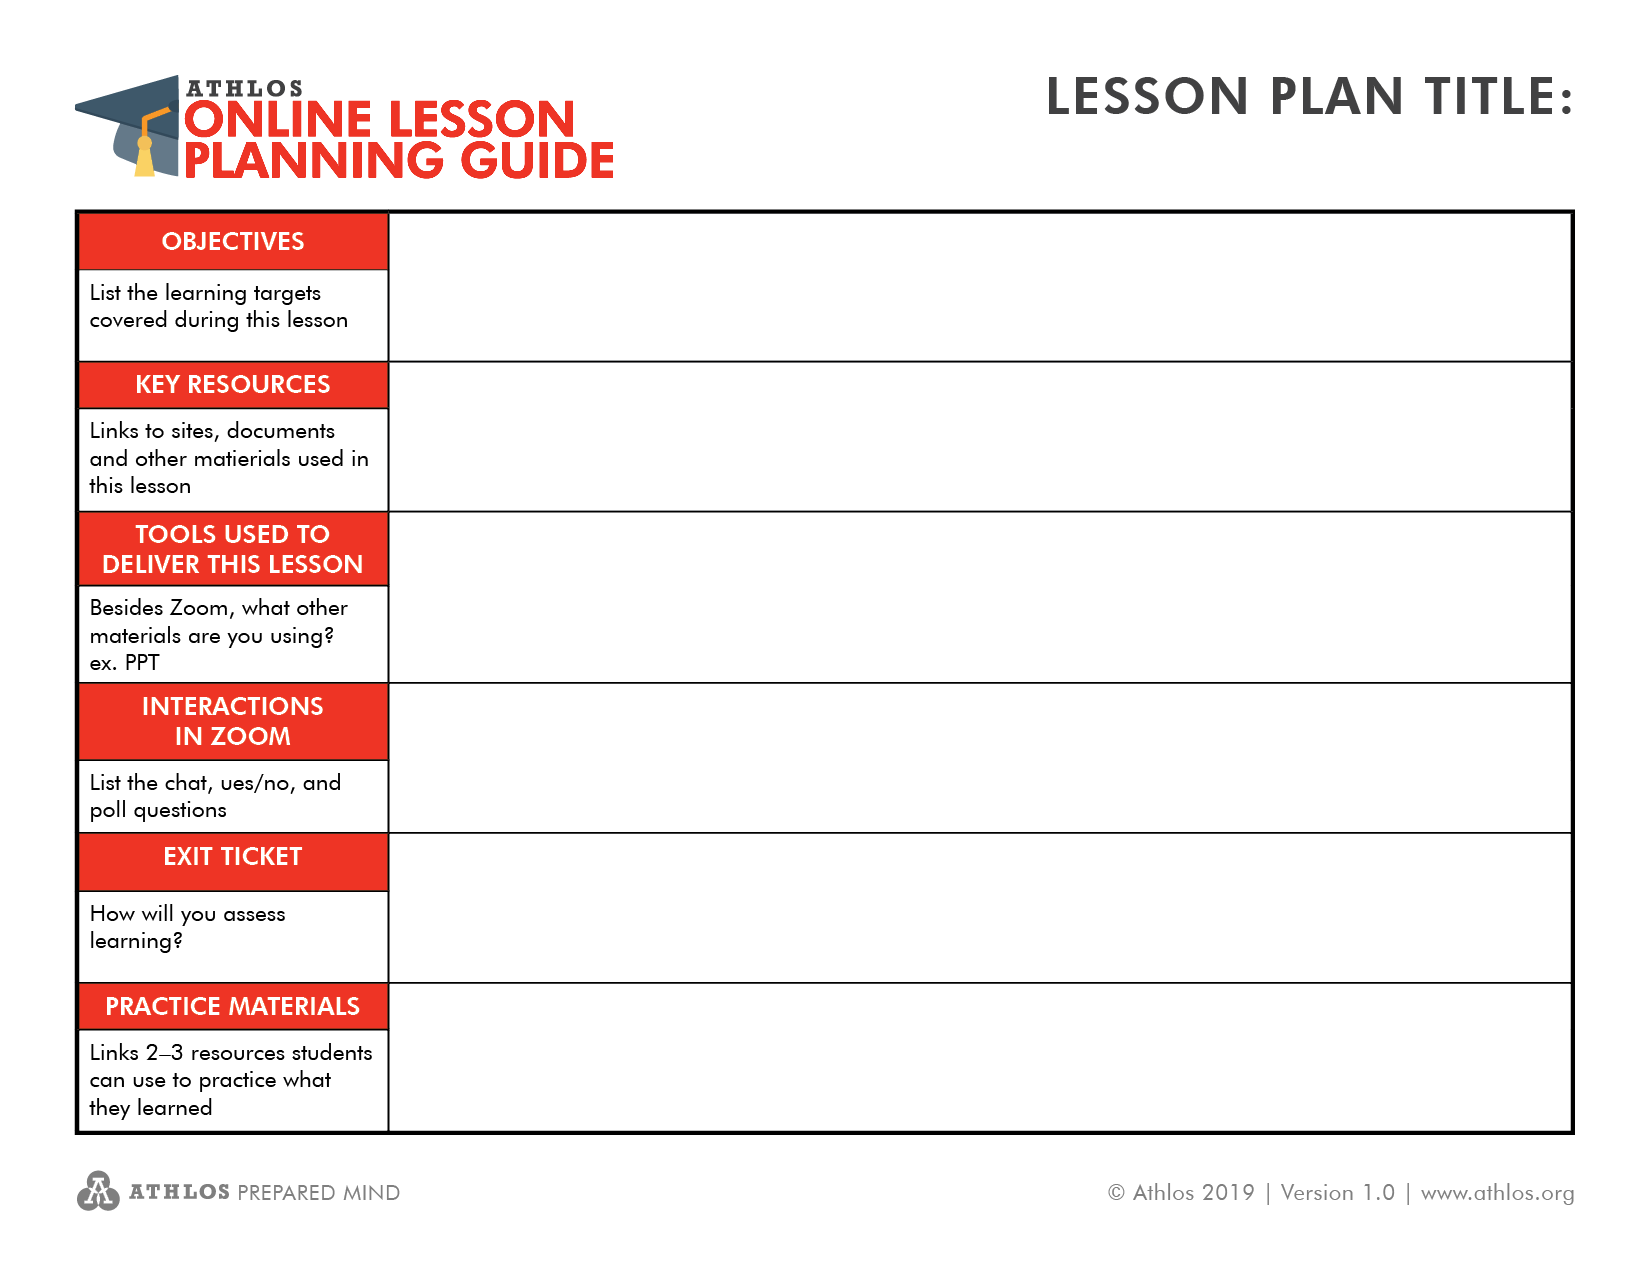
Just like any good lesson, it is a best practice to start by defining what you will be teaching, determining how you will teach it, and how you will assess students’ understanding. The FREE template you see below should be used to guide the development of your learning session. This is not intended to be a repeat of your formal lesson plan. The goal here is to organize your thoughts, expectations, and resources.
Tip #2: Make the appropriate adjustments to your Zoom meeting settings
Very much like in the classroom you will want to establish some rules and protocols to ensure students are on task and not disruptive. Prior to your online session, log into your Zoom account and select “Settings” on the left side of your screen, and consider the following:
One: do you want students to appear in video? This can be great for creating a sense of community but can also be a distraction to other learners. Use knowledge of your students to determine if this feature should be turned on or off.
Two: mute participants on entry. It is probably a good idea to turn this feature on, especially if learners are not familiar with Zoom and/or learning in the virtual space. Background noise could affect the learning experience for some or all learners. Plus, you can unmute anyone at any time, and learners can still communicate using chat, raising their virtual hand, and by responding to polls or yes/no questions. There are a variety of settings you can turn on or off, so take a few minutes to set up your preferences.
As you become more comfortable with your online Zoom sessions, you can dive into things like turning on a whiteboard, saving chats, creating breakout rooms, and adding an end of meeting survey to assess learners’ understanding.
Tip #3: Share Your Screen
Tip #4: Explain communication options and expectations
Tip #5: Include an icebreaker or warm-up that aligns to the objectives of the lesson
The structure of a good lesson does not change just because it is online. Start with an icebreaker or warm-up question that is aligned to the content. This could be a question to activate prior knowledge, a hook to get them excited about the session, or an opportunity to express what they hope to learn. You might, for example, ask students to stand and complete a series of stretches or movements, pose a “What would you do if” style question, or unmute individuals and ask them to explain what they know about the topic or share an experience. Nonetheless, it should set the tone for a productive session and not take more than 5-10 minutes.
Tip #6: Build in interactions and wait time
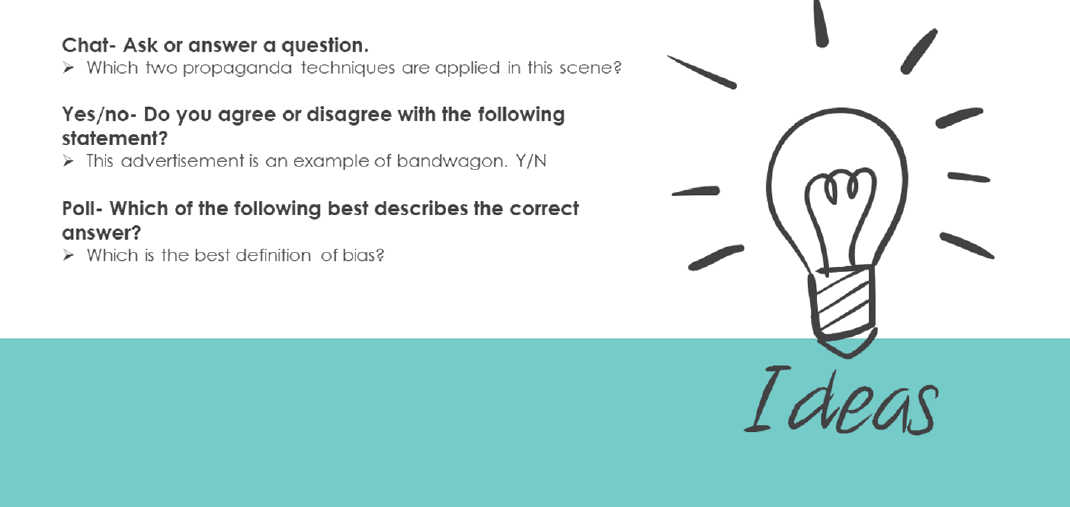
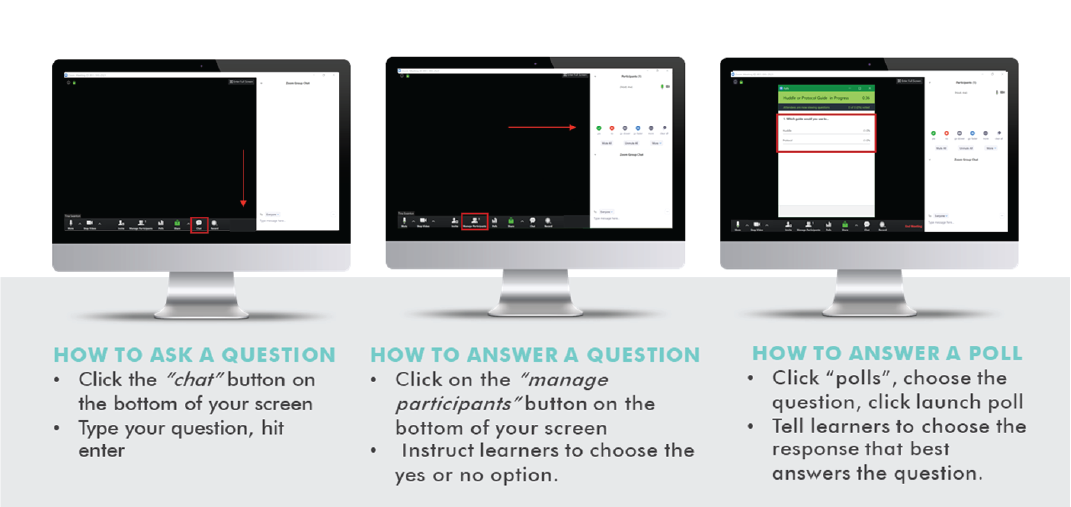
If learners are just listening to you talk, chances are they are going to lose interest. Don’t take it personally, it happens. Consider how you can build in simple interactions to ensure your learners are engaged and paying attention. This is easy to accomplish in Zoom. Let’s revisit the idea of chat, yes/no, and poll questions. Creating interactions using these features does not have to be tedious, it can be as simple as asking a question to elicit a response that demonstrates understanding.
While planning your lesson be cognizant of the type and number of interactions. If you are working within a specific time limit be sure to build in time for learners to respond to the interactions and to ask questions as they arise or set aside time for questions at the end of your session. Remember, these interactions are to keep the learners’ attention and do not necessarily reveal evidence of a deep understanding. Though you can pose thought-provoking questions consider these interactions as formative assessments during your lesson. Evidence of proficiency, mastery, or application of knowledge should be evident in assignments, activities, and assessments you provide.
Tip #7: Introduce the objectives and present your content
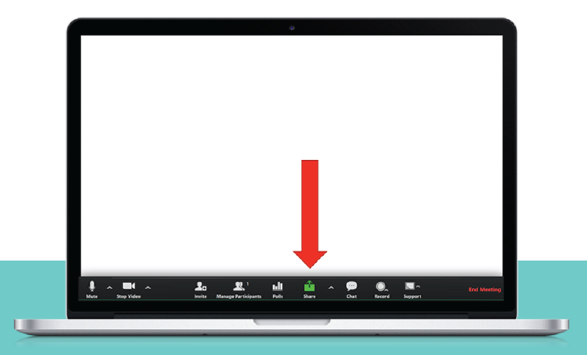
Now you are ready to launch your online session. As previously mentioned, you should start with an icebreaker or warm-up. Then, review the objectives that will be covered during the session and present your content. Since you are sharing your screen, it will be simple to teach from your PowerPoint, or create an interactive lesson using Nearpod, annotate on a document, or model how to complete a task on a website.
There are a million and one tools you can use, but the tip here is to keep it simple. Use what you know and what you are comfortable with. Remember, you can provide learners with a recording of this session so they can go back and watch it as many times as needed.
Tip #8 Reviewing objectives and formatively assess:
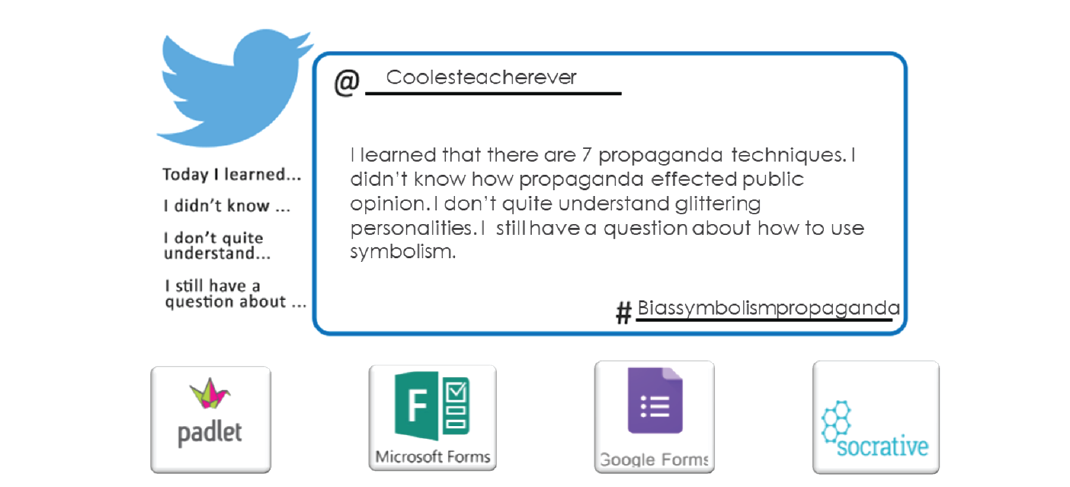
Before you end your online session, be sure to review the objectives you covered. Following the review, you should construct some sort of exit ticket that the students are required to complete. The exit ticket can be almost anything. You could provide a link to a Padlet for a discussion, create a survey or quiz using Microsoft or Google Forms, or get real-time results using Socrative. The options are endless, but again, try to stick with something you know and are comfortable using.
Tip #9 Provide learning resources for independent practice:
Leave your learners with opportunities to practice what they learned. Again, there are many resources out there you can use. Consider what you have available from your textbook resources. Are there any online components you can use? What websites do you use? Are there any online games learners can play? Keep in mind you can always have learners submit a screenshot of a completed activity.
While the transition to teaching using Zoom as an online lesson platform will likely come with a learning curve, expect there to be bumps along the road to success and remember to stay positive. You CAN do this! Best of luck as you embark on this new experience.
Quick Review
- Prepare your lesson plan using the template. Not intended to be a detailed lesson plan, just the gist of what you will be teaching.
- This document includes the following.
- Objective(s)
- Link or list key resources used
- What tool(s) are you using to deliver the presentation? i.e. PPT, Prezi, Nearpod, etc.
- Interactions in Zoom- chat, yes/no questions, polls, if appropriate.
- Exit ticket
- Next steps and links to Independent Practice resources
- This document includes the following.
- Make the appropriate adjustments to your Zoom meeting settings.
- Share your screen.
- Explain communication options and expectations.
- Include an icebreaker or warm-up that aligns with the objectives of the lesson.
- Build in interactions and wait time.
- Introduce the objectives and present your content.
- Reviewing objectives formatively assess. Provide learning resources for independent practice.

